操作系统小作业:添加系统调用
环境
- gcc版本
gcc version 10.2.1 20210110 (Debian 10.2.1-6) - Linux
host版本
Linux Neumann 5.8.0-kali3-amd64 #1 SMP Debian 5.8.14-1kali1 (2020-10-13) x86_64 GNU/Linux - Linux guest
kernel版本
Linux (none) 5.11.10 #19 SMP Tue Mar 30 21:08:52 CST 2021 x86_64 GNU/Linux - qemu版本
qemu-x86_64 version 5.2.0 (Debian 1:5.2+dfsg-9) - busybox版本
BusyBox v1.32.0 (2020-10-14 22:48:22 CST) multi-call binary.
实验目的
添加原型如下的系统调用:
1 | |
该调用接受一个addr参数,该参数是一个用户态地址空间的地址,并返回该地址对应的物理地址。
实验过程
修改并配置内核
从官网下载Linux最新版tar包并解压
在
arch/x86/entry/syscalls/syscall_64.tbl中添加下面一行1
335 64 phy_addr_at sys_phy_addr_at修改
include/linux/syscalls.h,添加系统调用的声明在
mm/目录下新建文件phy_addr_at.c,在其中给出系统调用对应函数的定义如下:1
2
3
4
5
6
7
8
9
10
11
12
13
14
15
16
17
18
19
20
21
22
23
24
25
26
27
28
29
30
31
32
33
34
35
36
37
38#include <linux/kernel.h>
#include <linux/syscalls.h>
#include <linux/mm.h>
#include <linux/hugetlb.h>
#include <asm/current.h>
#include <asm/pgtable_types.h>
SYSCALL_DEFINE1(phy_addr_at, unsigned long, addr) {
resource_size_t res = 0;
pte_t *pte;
spinlock_t *ptlp;
if (current->mm == NULL) {
printk("error: current process is anonymous.");
return -1;
}
/**
* 通过mm_struct获取pgd,即第一级页表,然后根据addr逐级深入,
* 最终获得pte,即第四级页表(page table entries)的页表项,
* 注意这个过程需要锁ptlp
*/
follow_pte(current->mm, (unsigned long)addr, &pte, &ptlp);
// 从pte表项中提取pfn,即物理页地址
unsigned long pfn;
pfn = pte->pte;
pfn ^= (pfn && !(pfn & _PAGE_PRESENT)) ? ~0ull : 0;
pfn = (pfn & PTE_PFN_MASK) >> PAGE_SHIFT;
// 由物理页地址以及当前虚拟页偏移得到实际物理地址
res = (pfn << PAGE_SHIFT) | (addr & ~(~0 << PAGE_SHIFT));
// 注意释放资源
pte_unmap_unlock(pte, ptlp);
return (unsigned long long)res;
}修改
mm/Makefile,在其中添加一行1
obj-y += phy_addr_at.o以保证我们添加的函数被链接入内核
使用
make menuconfig配置内核,为了调试方便,这里将Kernel hacking > Compile-time checks and compiler options > Compile the kernel with debug info勾选上。其余保持默认设置。
编译并启动内核
使用
make编译内核,然后使用make bzImage获取启动镜像下载
busybox并编译,得到包含静态链接二进制文件的_install目录,此时该目录结构如下:1
2
3
4
5
6
7
8
9
10
11
12
13.
├── bin
│ ├── ...
│ └── zcat -> busybox
├── initramfs
├── linuxrc -> bin/busybox
├── sbin
│ ├── ...
│ └── zcip -> ../bin/busybox
└── usr
├── bin
└── sbin可以看到目录中还缺少根目录所需要的
proc/,dev/以及sys/文件夹,我们手动创建这三个文件。同时创建一个test文件夹,将我们的测试文件放到该目录下。这时我们还需要一个init文件,使内核启动后进行一些初始化工作。脚本内容如下(就是挂载特殊的文件系统然后启动shell):
1
2
3
4
5#!/bin/sh
mount -t proc none /proc
mount -t sysfs none /sys
exec /bin/sh最后,我们在该目录下使用下面这一条指令生成根文件系统:
1
find -print0 | cpio -0oH newc | gzip -9 > ../initramfs.cpio.gz接下来,我们使用qemu启动内核即可
1
2
3
4
5
6
7
8
qemu-system-x86_64 \
-enable-kvm \
-gdb tcp::7777 \ # gdb remote debug port
-m 512M \ # guest memory size
-kernel linux-5.11.10/arch/x86_64/boot/bzImage \ # boot image
-initrd ./busybox-1.32.0/initramfs.cpio.gz \ # root filesystem
-nographic \ # do not use graphic interface
-append "console=ttyS0 nokaslr" \ # disable kaslr
运行程序与调试
我们提前编写了一个使用了自定义syscall的程序如下:
1 | |
可以看到,我们试图通过该程序验证“两个不同进程中的同一虚拟地址对应的物理地址一般不同”这一事实,我们首先通过fork获取一个子进程,然后在父子进程中调用自定义系统调用来输出具有相同虚拟地址的变量对应的物理地址。注意为了验证系统调用结果的正确性,我们使用了proc/pid/pagemap这一用户态可直接访问的特殊文件来获取一个虚拟地址对应的物理地址。
将该程序编译为静态链接的elf后放入前面提到过的test目录中,然后在启动的内核shell中运行该程序。
使用gdb远程调试界面如下:

然后运行该程序,结果如下:
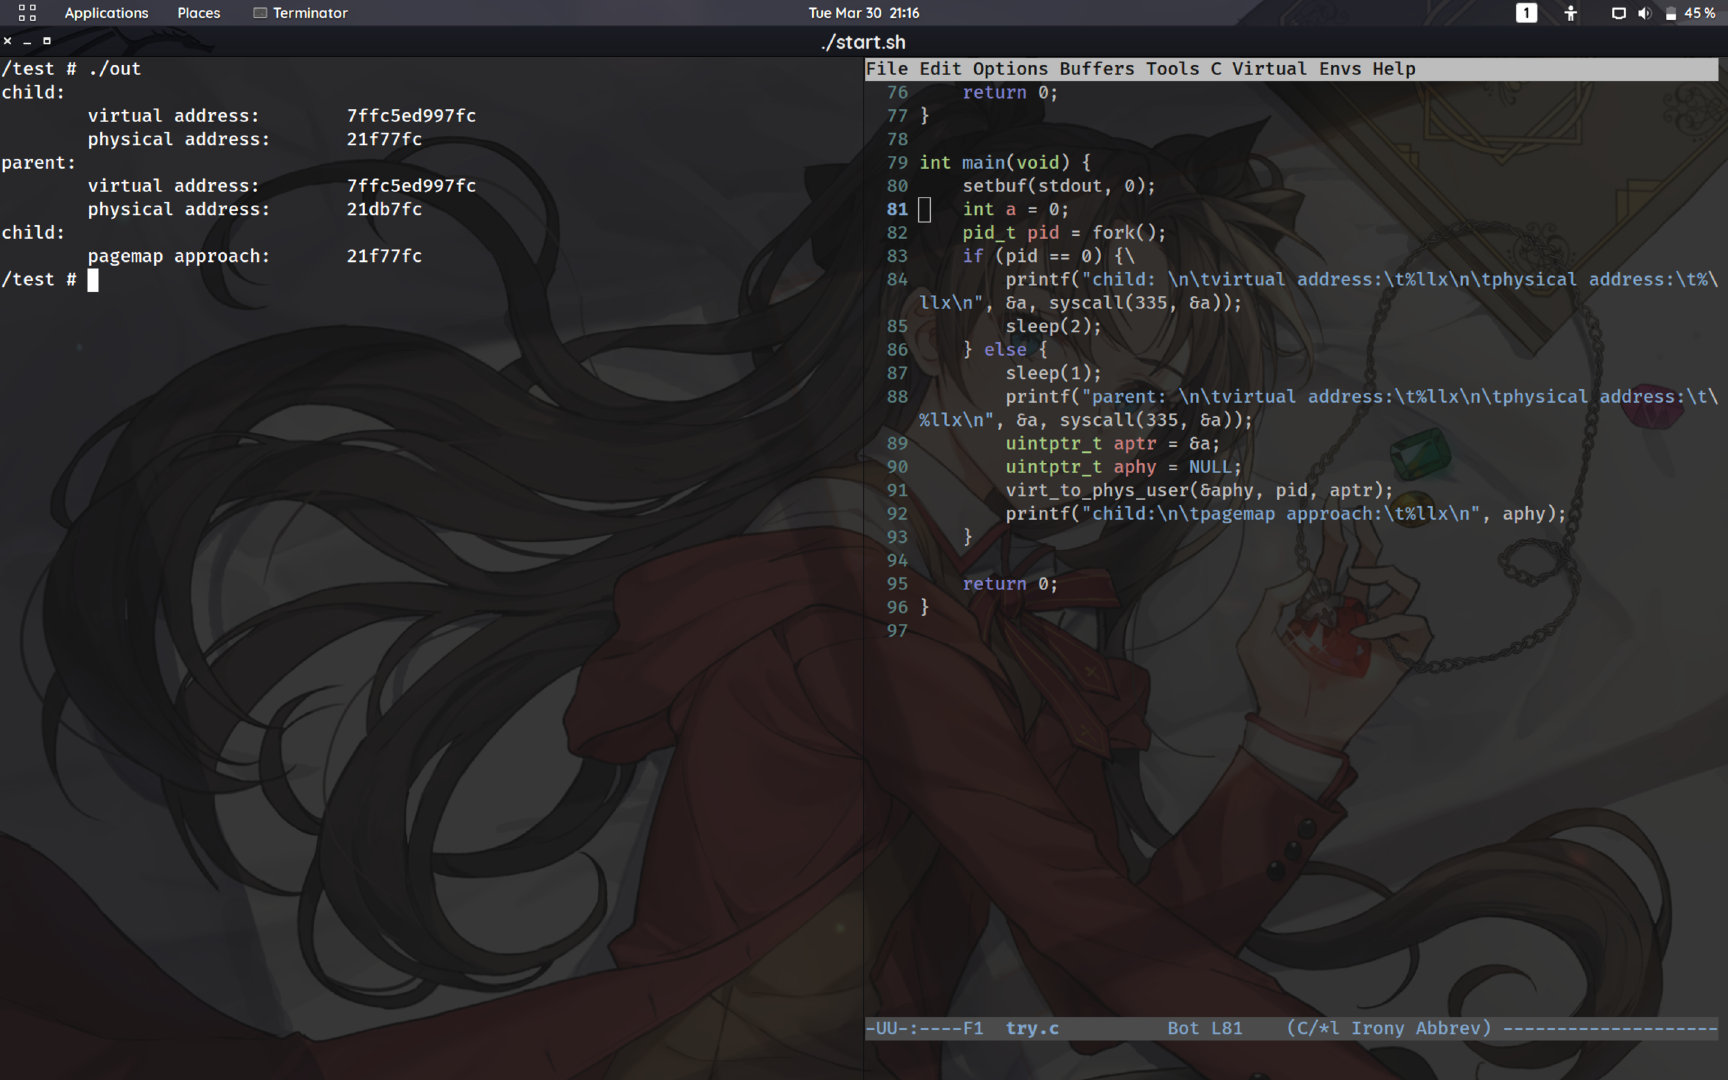
可以看到,程序的输出符合预期。
总结
通过本实验,主要了解了向Linux内核添加系统调用的一般过程以及内核有关页表管理的知识。
参考资料
https://github.com/torvalds/linux/blob/master/include/linux/mm.h
https://github.com/lorenzo-stoakes/linux-vm-notes/blob/master/sections/page-tables.md
https://en.wikipedia.org/wiki/Vmlinux
https://stackoverflow.com/questions/2440385/how-to-find-the-physical-address-of-a-variable-from-user-space-in-linux?noredirect=1&lq=1